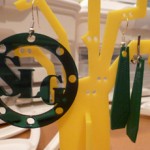
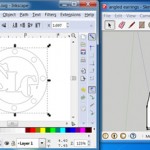
Today we’re providing a preview of the laser-cut earring and the 3D-printed earring.
The laser-cut earring workshop is inspired by a great tutorial we found online by Jennifer Adkins called “How to Design a Monogram Christmas Ornament (in Inkscape!).” In this workshop, you’ll create a round frame for your monogram. You’ll add your initials, or any letters you prefer, and rearrange them so they fill the inner circle. You’ll add a small hole at the top for the fish hook or clip-on earring, copy and paste the design. The default size is 2 inches across, but you can make that smaller or larger as desired. Your design is cut from ⅛” thick acrylic in solid colors, translucent colors or bamboo veneer.
For the 3D-printed earring, you’ll start off by connecting lines in SketchUp. Once you have a desirable shape, you’ll add a hole for the earring, and a depth of about 2mm. An object a few inches long and only a millimeter thick prints rapidly. The green dangle earrings in the photo printed in six minutes, and the yellow earrings printed in five minutes. Acrylic is smooth and reflective, while the 3D-printed earrings show textured lines on the surface, traces of the printing process.
Look forward to more previews of other new classes soon!
In the meantime, what do you think of the headlines making the rounds?
- INFOGRAPHIC: 3D Printing & Design Top Jobs
- Meet the new hotness: All-in-one 3D printer-and-scanners
- Why the market for 3D printing will triple in five years
Decide for yourself by signing up for a workshop or stopping by to visit.


